3D Modeling Household Objects
26th June 2023
1) Modeling a lamp
The first household object I decided to model was a lamp. My goal is to succesfully model a good-looking lamp without using any tutorials, and therefore test my 3D modeling skills.
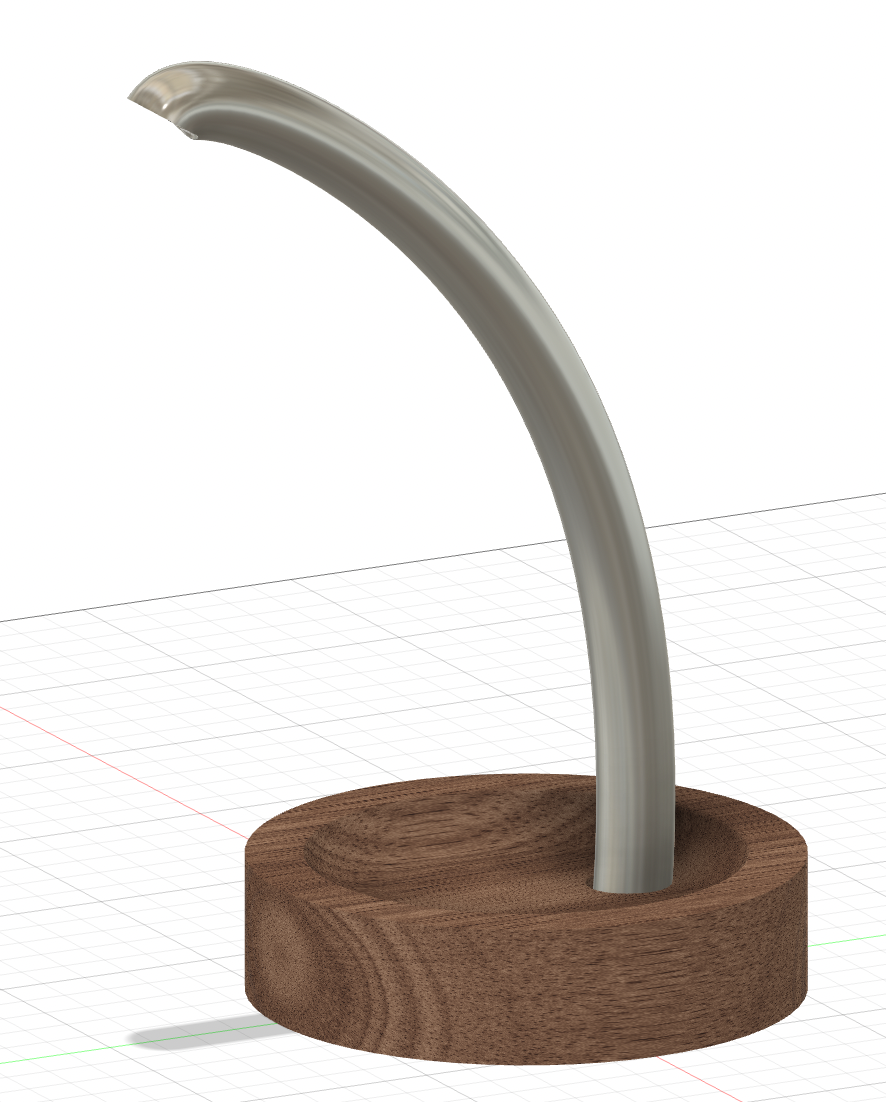
I started modeling the base, which I made with 2 circles (one with a fixed diameter of 120 mm, and the other with a fixed offset of -12.5 mm). I also added a smaller circle off-center, which is where the arm of the lamp will come out of.
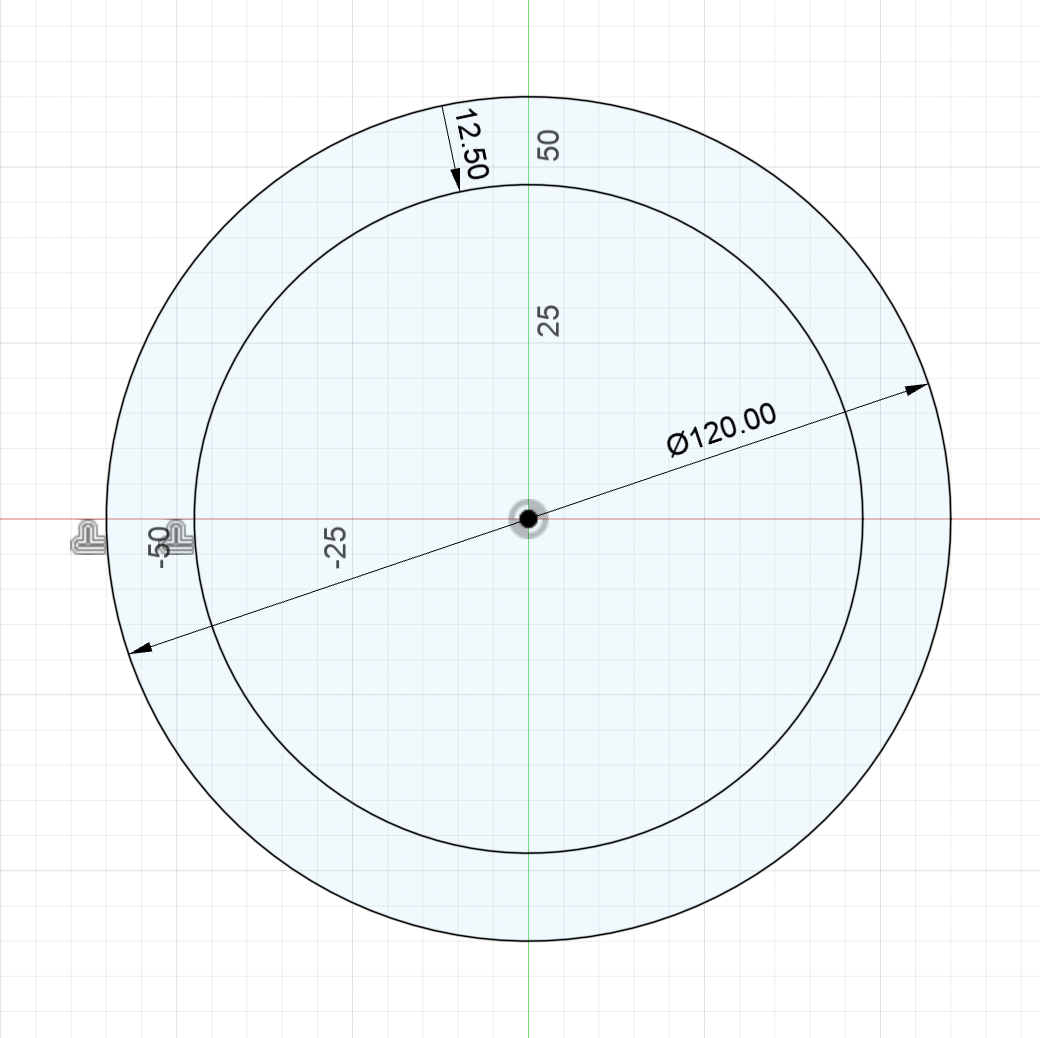
I then extruded the outer circle 30 mm and the inner circle (without the off-centered circle) 20 mm. To make it look better, I used a fillet with a rolling ball corner type.
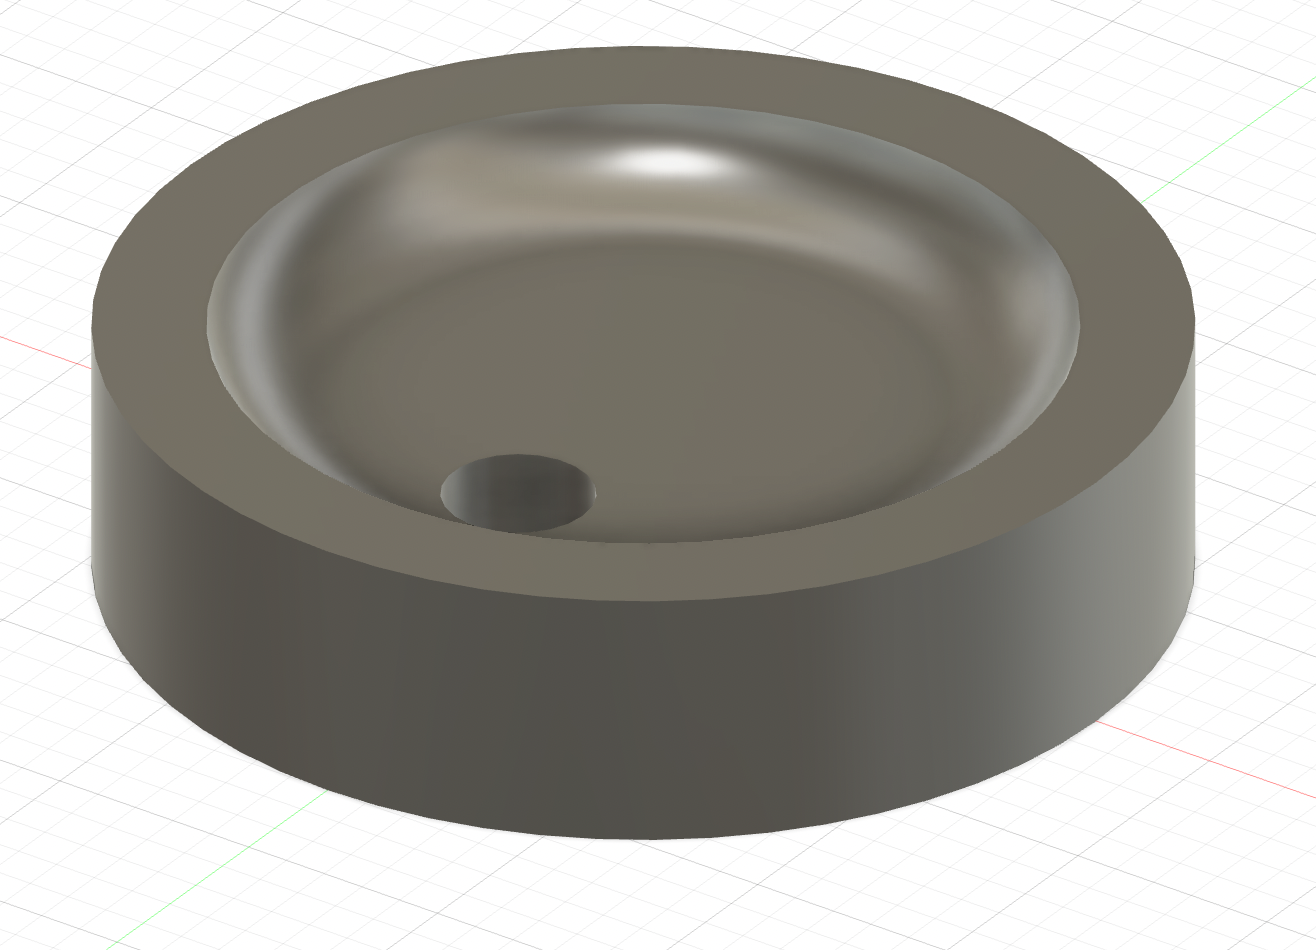
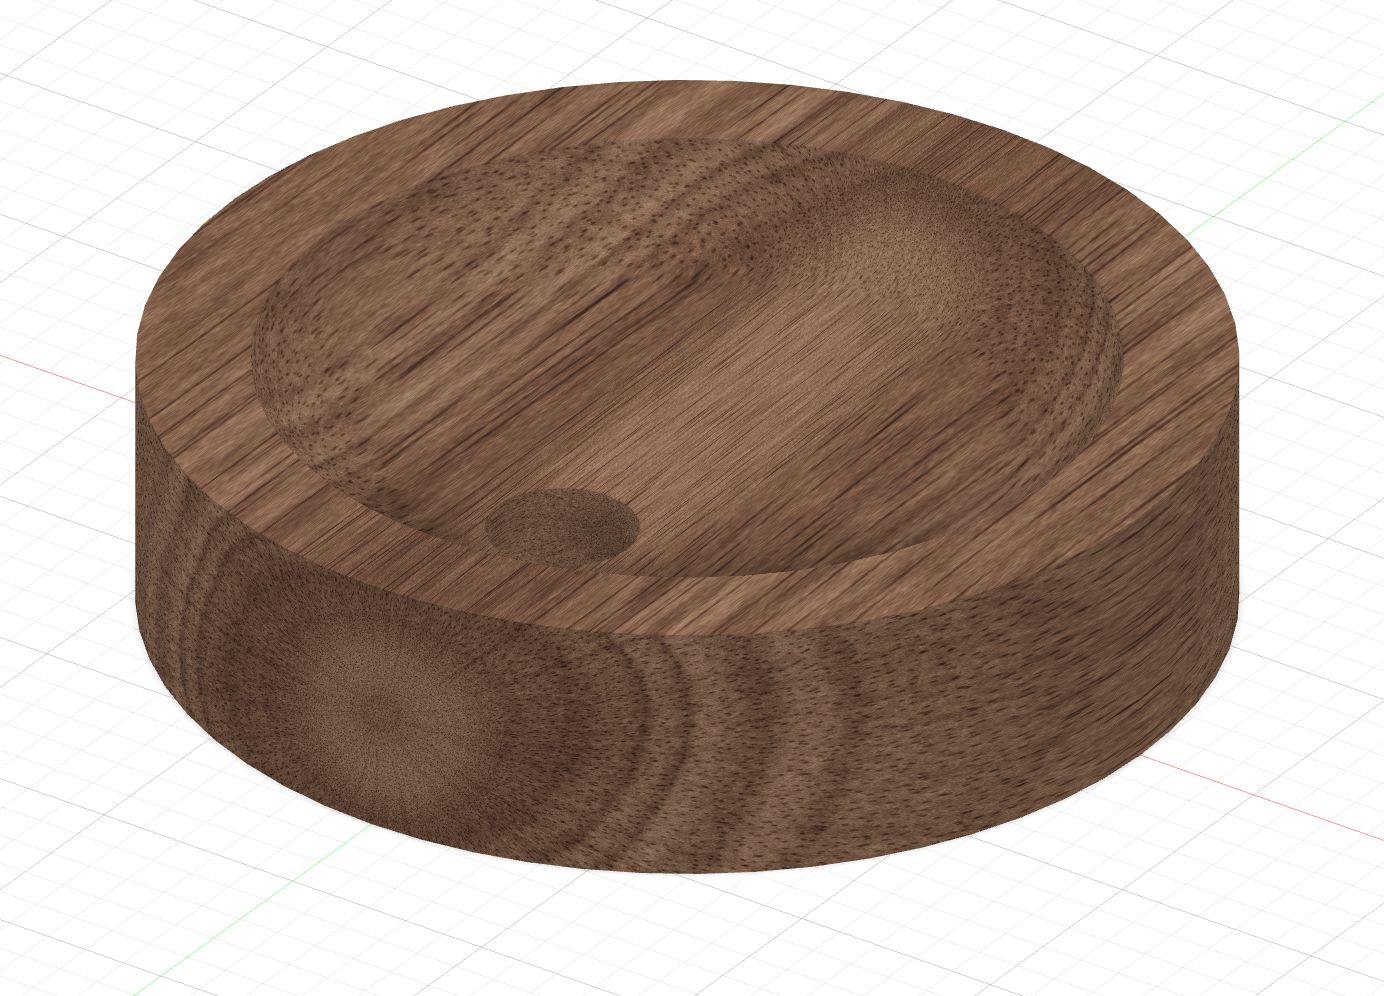
Side note: Adding appearances to 3D models can make them look a lot better (even if it's just a visual thing, it can make modeling much more pleasing). You will find bellow a picture of that same base with a wood appearance, and you'll notice that it looks a lot better.
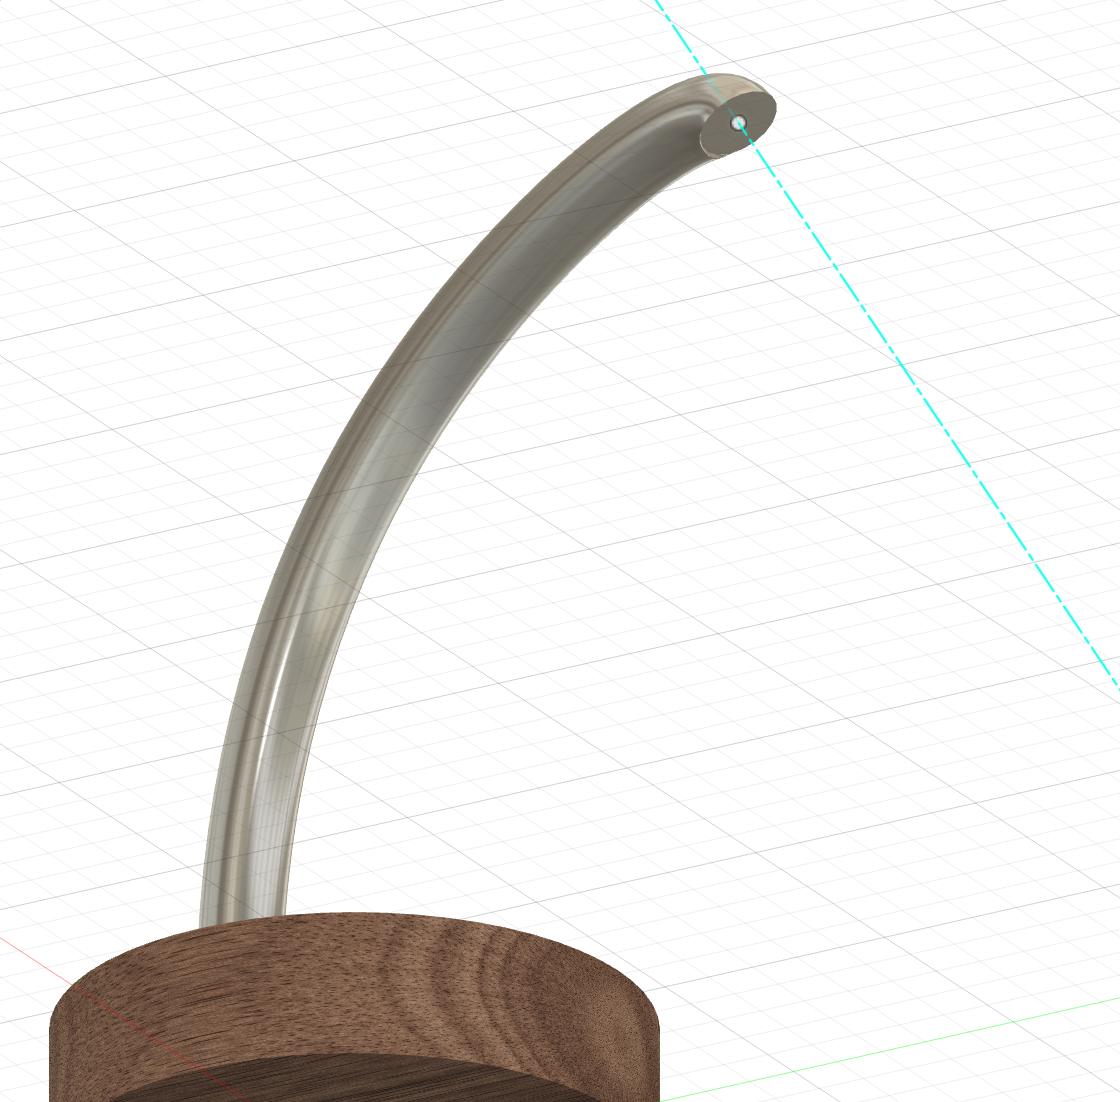
I then started to work on the arm. I started by sketching a path, which will be followed by a profile (a circle in this case) to create the 3D arm. I created the path using the spline tool and eyeballing the general shape (it's really hard to measure curved objects, and I never intended to have an exact replica of my lamp).
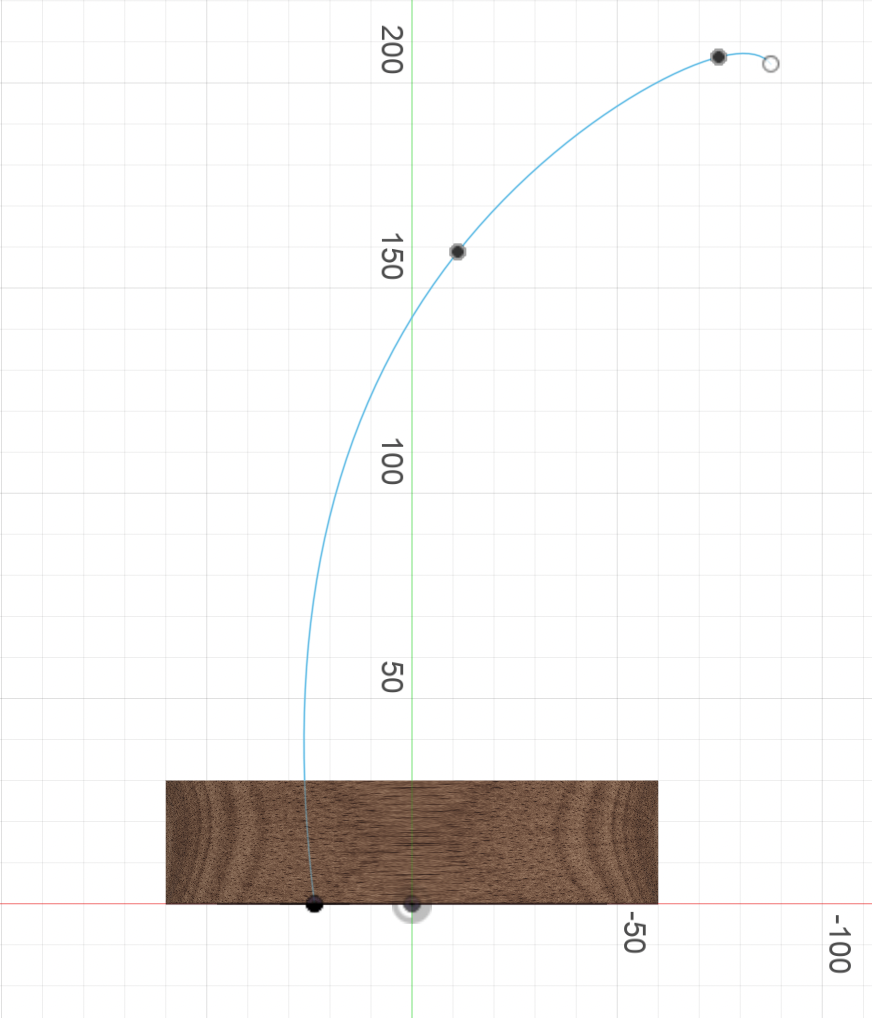
After finishing the path, I used the sweep tool to generate a 3D model of the path using the off-cetered hole we sketched earlier as a profile.
The next step was undoubtedly the hardest part of the modeling process: the lampshade. I knew I wanted
to do some kind of triangle, but I didn't know where to start. After taking a look at the different tools Fusion
has, I decided to use the
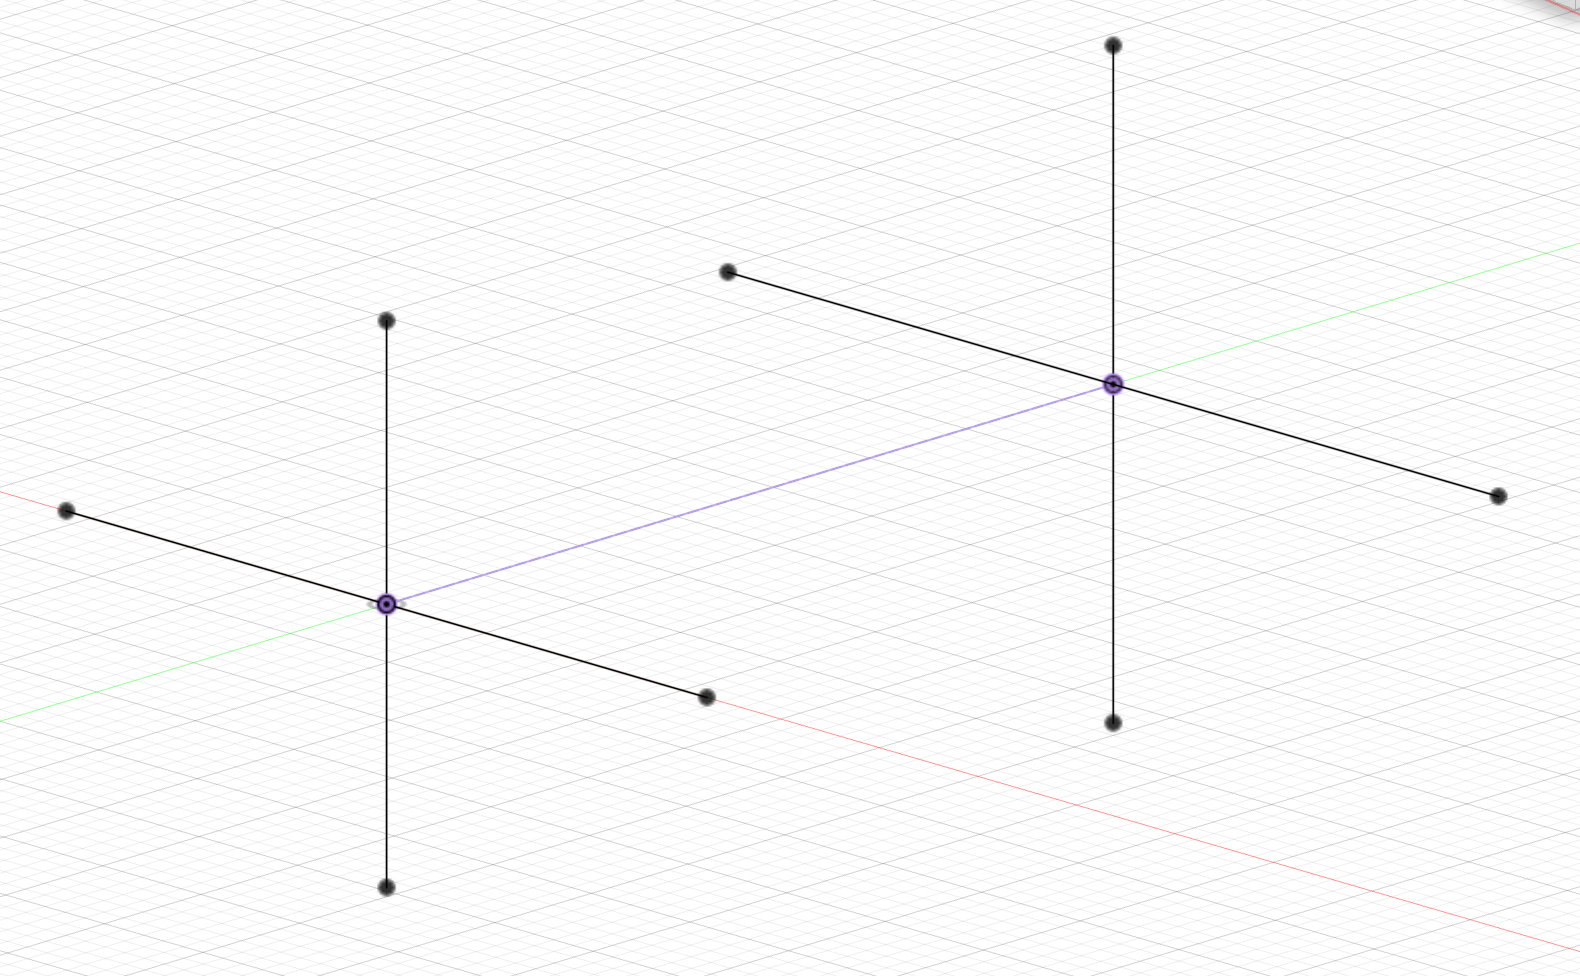
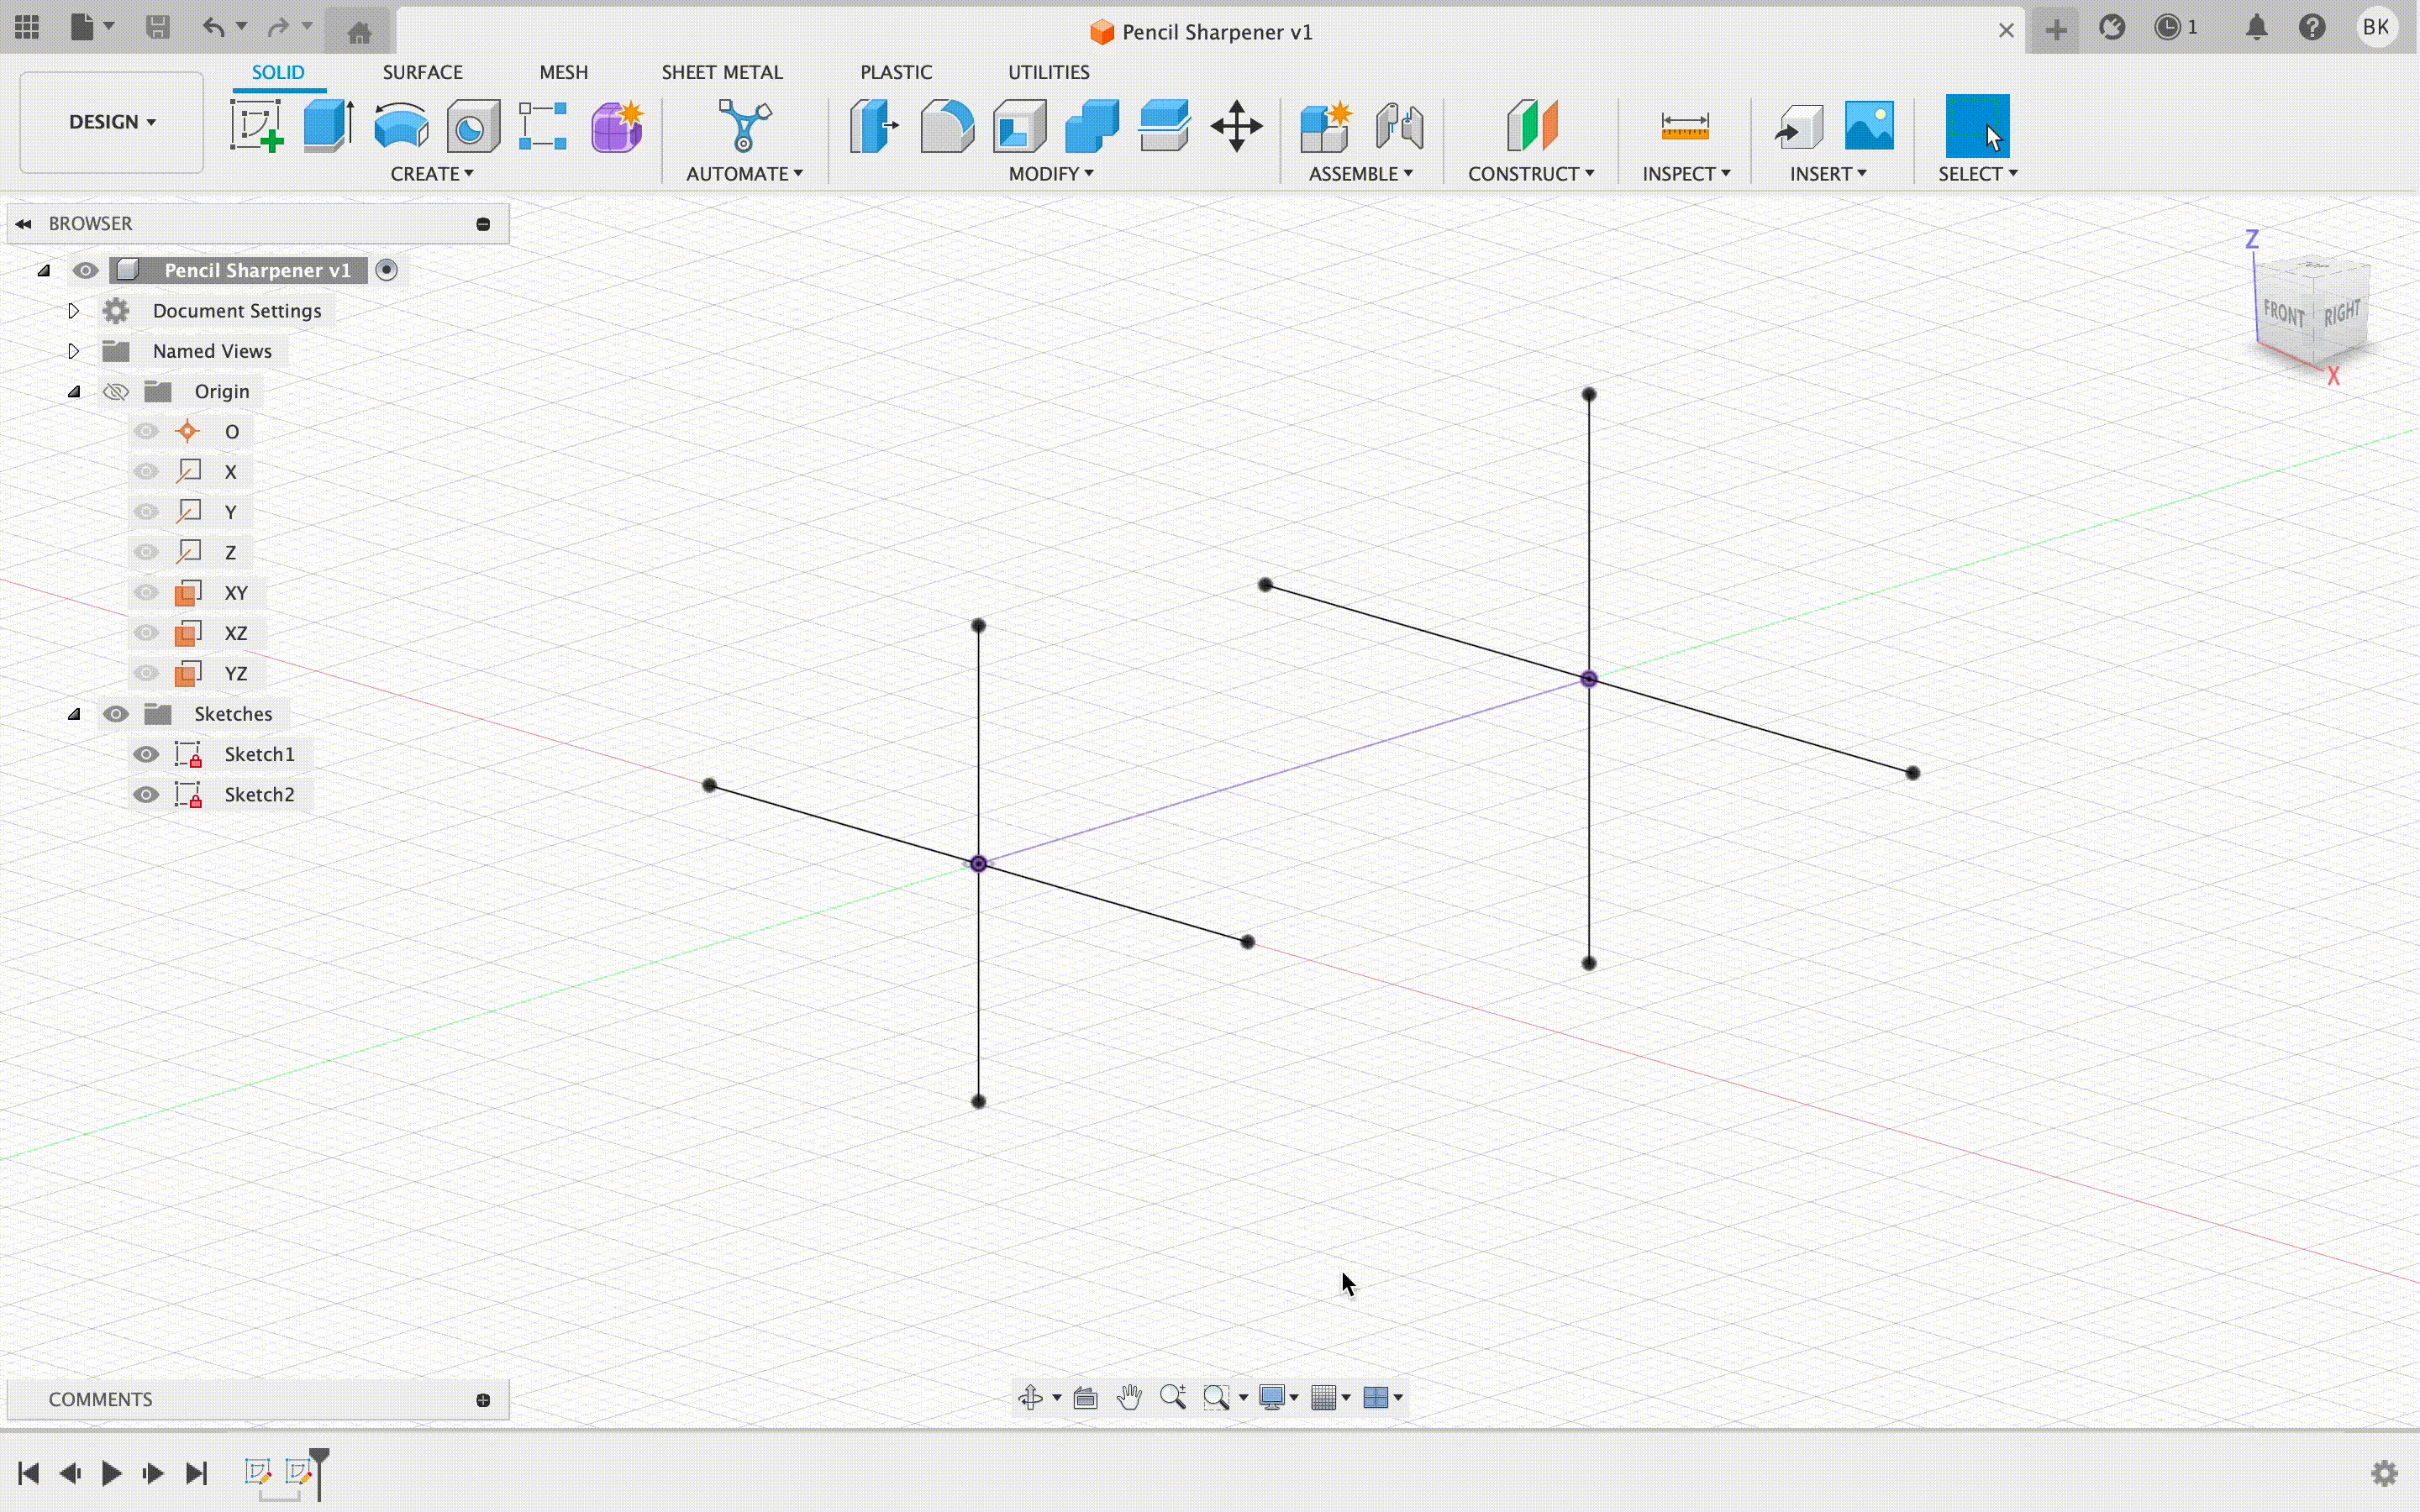
Using that axis, I created a plane which I used to create a sketch. The sketch is essentially a straight line with a 75 degree angle and a length of 70 mm.
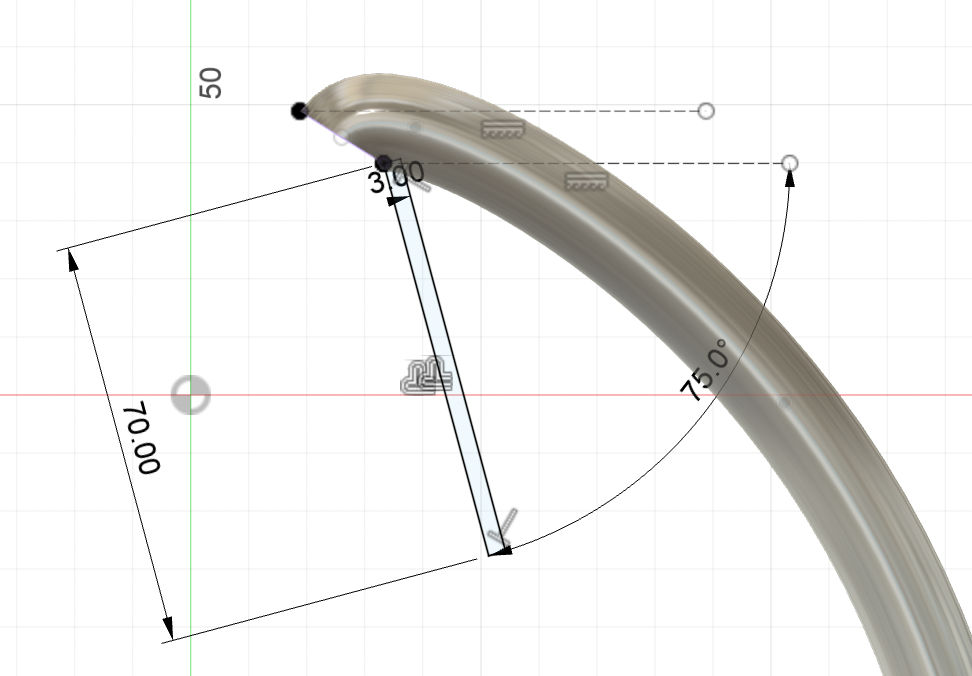
Finally, I used the revolve tool to replicate that sketch along the axis we created earlier. I used a 360 degree angle to make a full circle, and therefore have a closed lampshade.
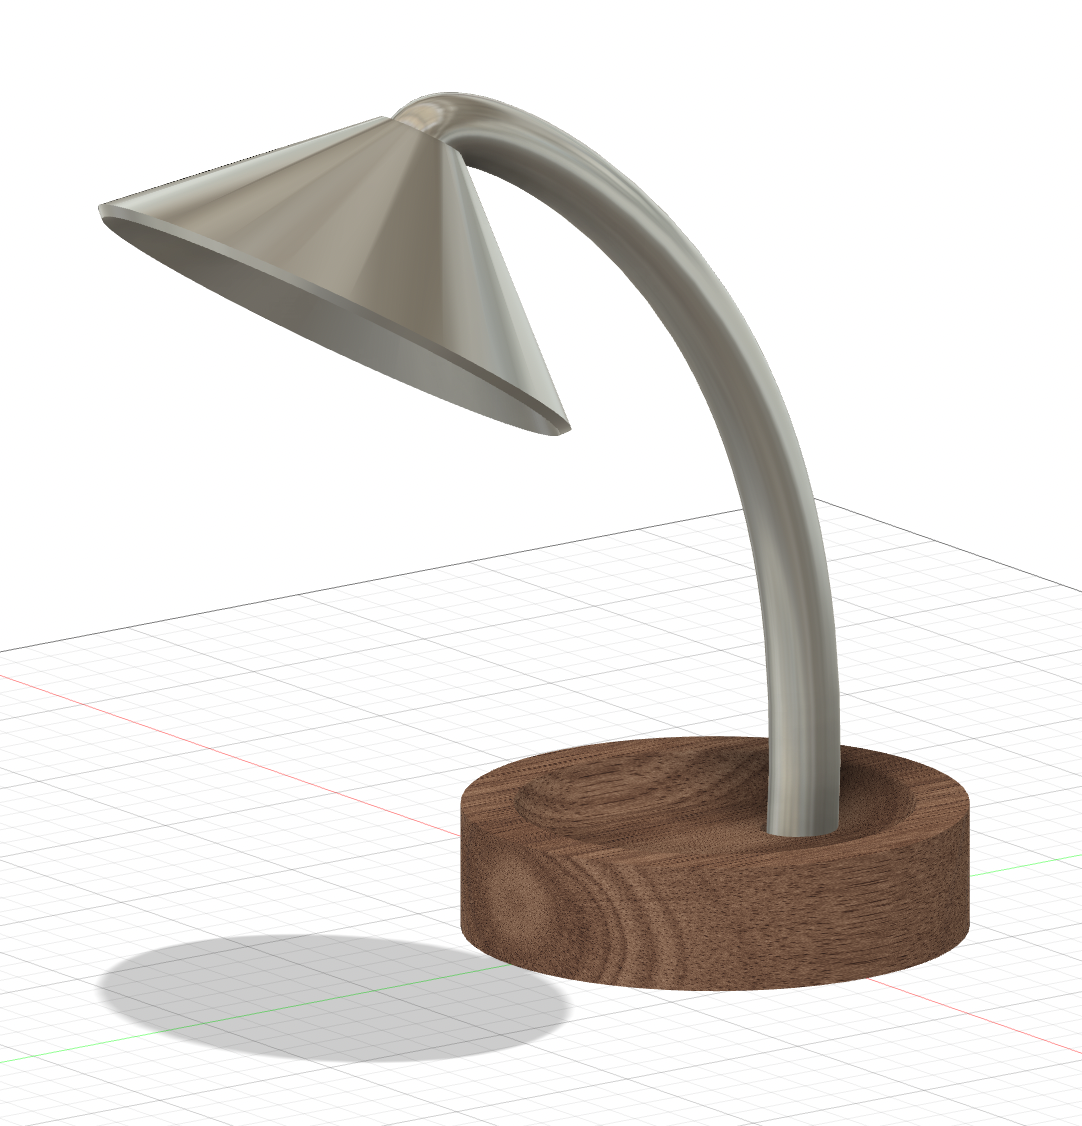
If you want to take a look at the design, you can download the .stl file or the Fusion360 .f3d file, or you can interact with it below!
2) Modeling a pencil sharpener
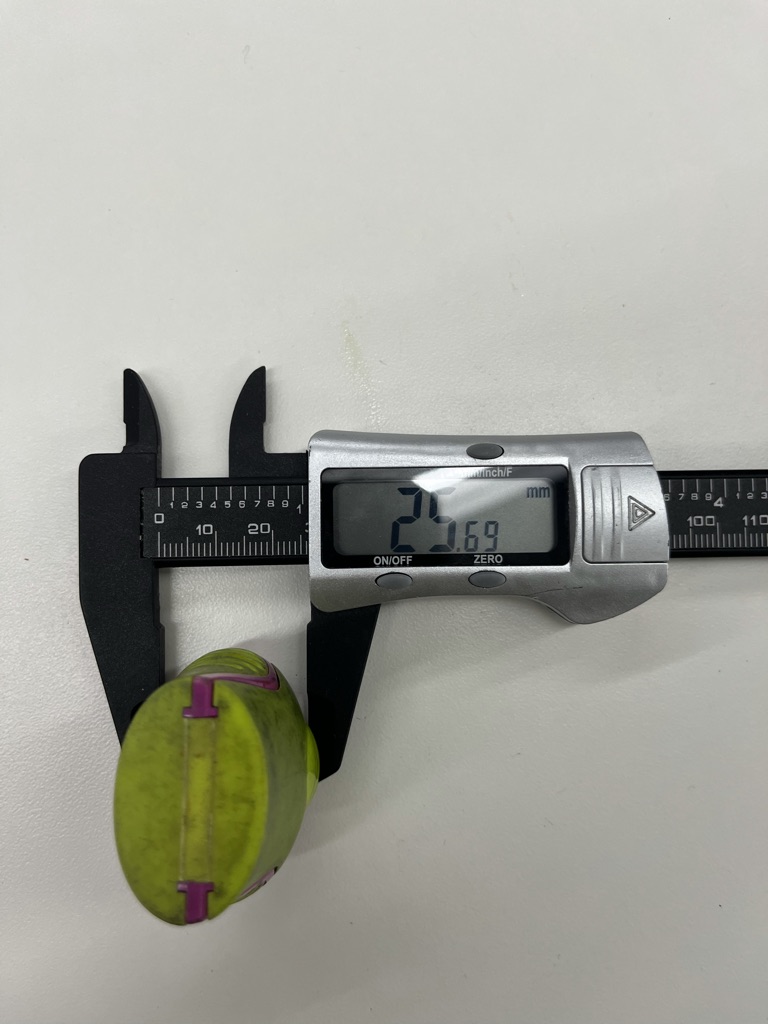
The second object I'm going to model is a pencil sharpener. This time, I will try to replicate my real pencil sharpener as accurately as possible. That is why I'm going to use a caliper, which I strongly encourage anyone who wants to accurately model something to use.
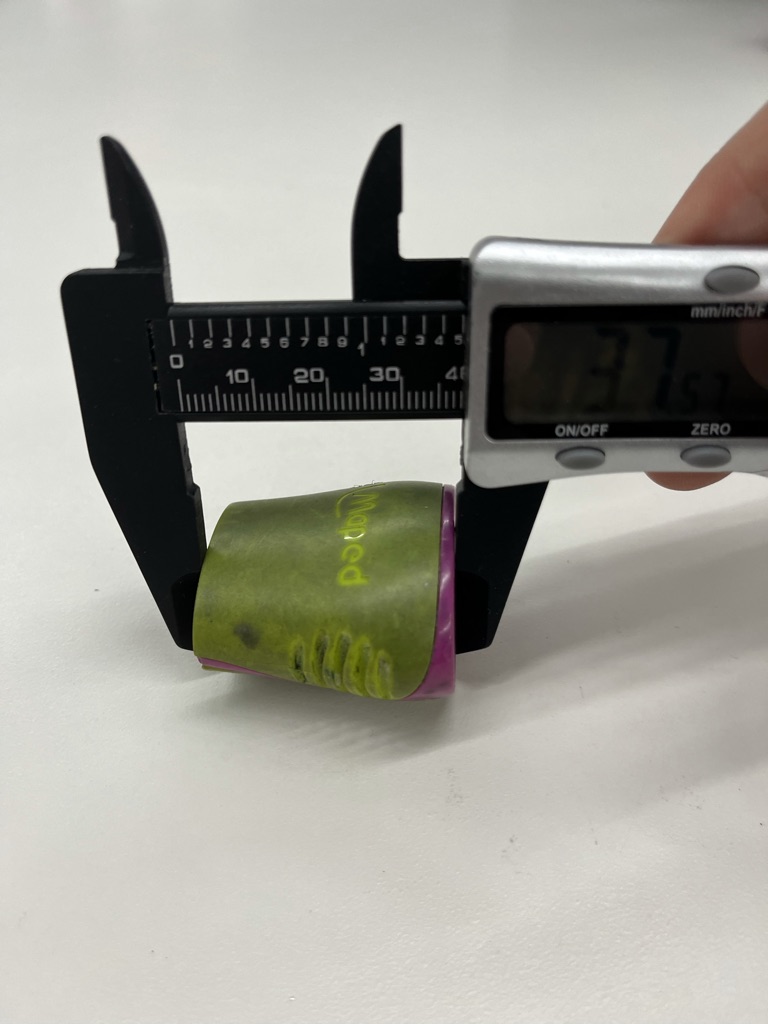
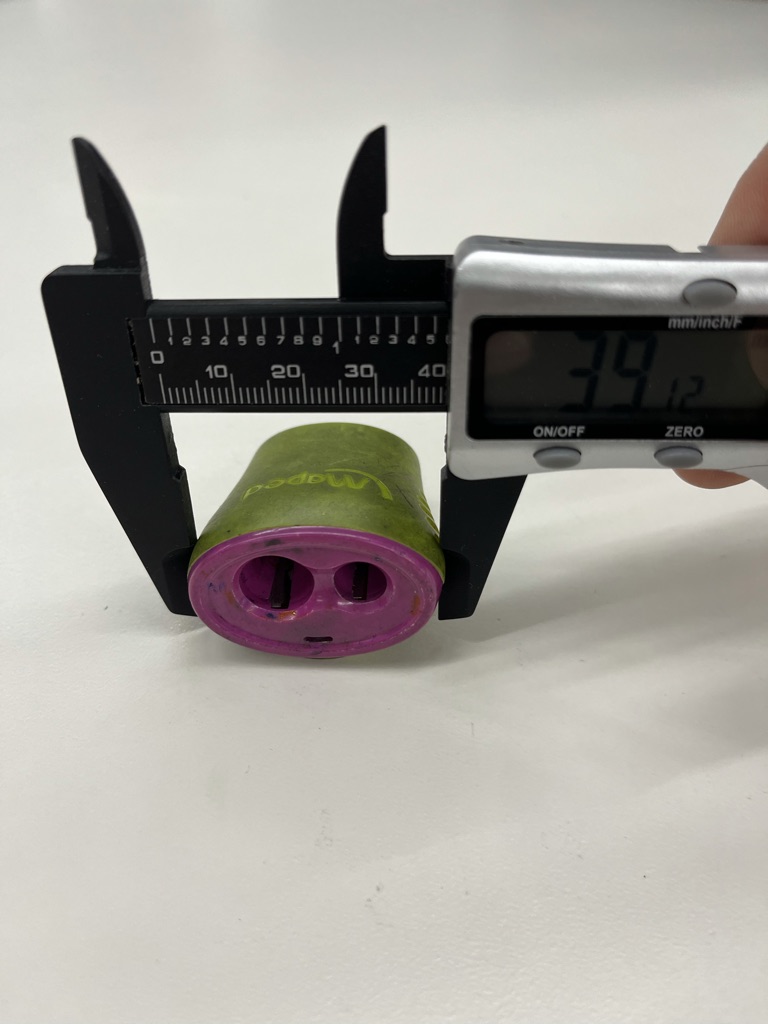
After taking a few measurements (you will find the measurements bellow) I sketched a simple top-down view of the sharpener.
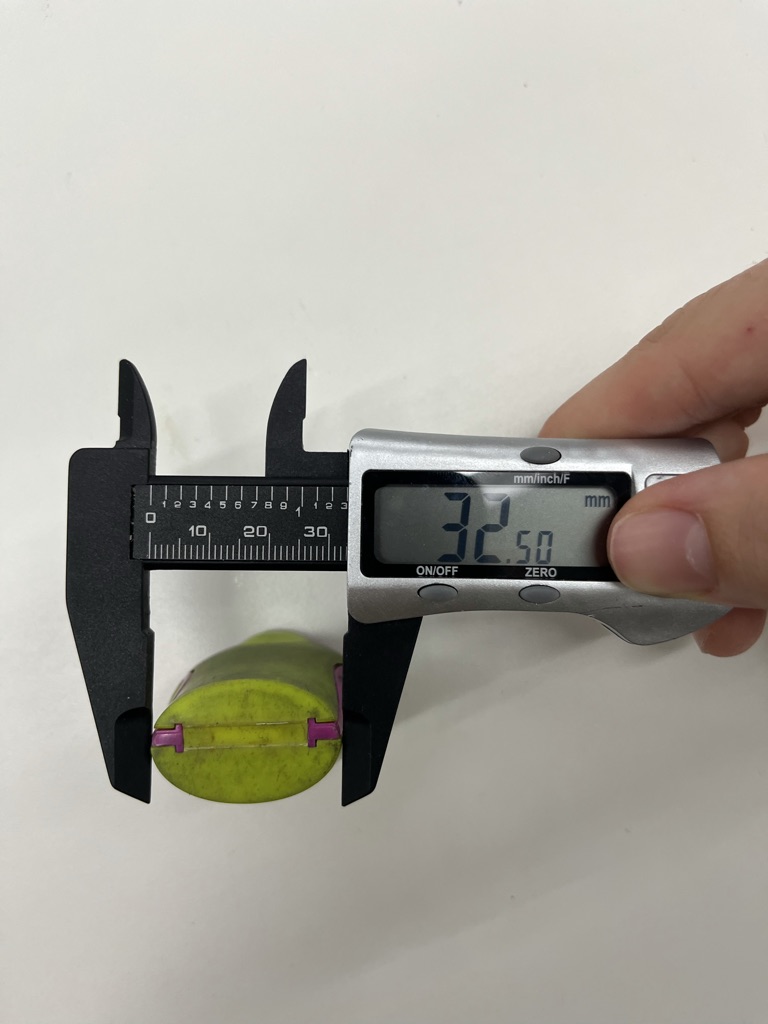
32.5 mm
37.6 mm
39.1 mm
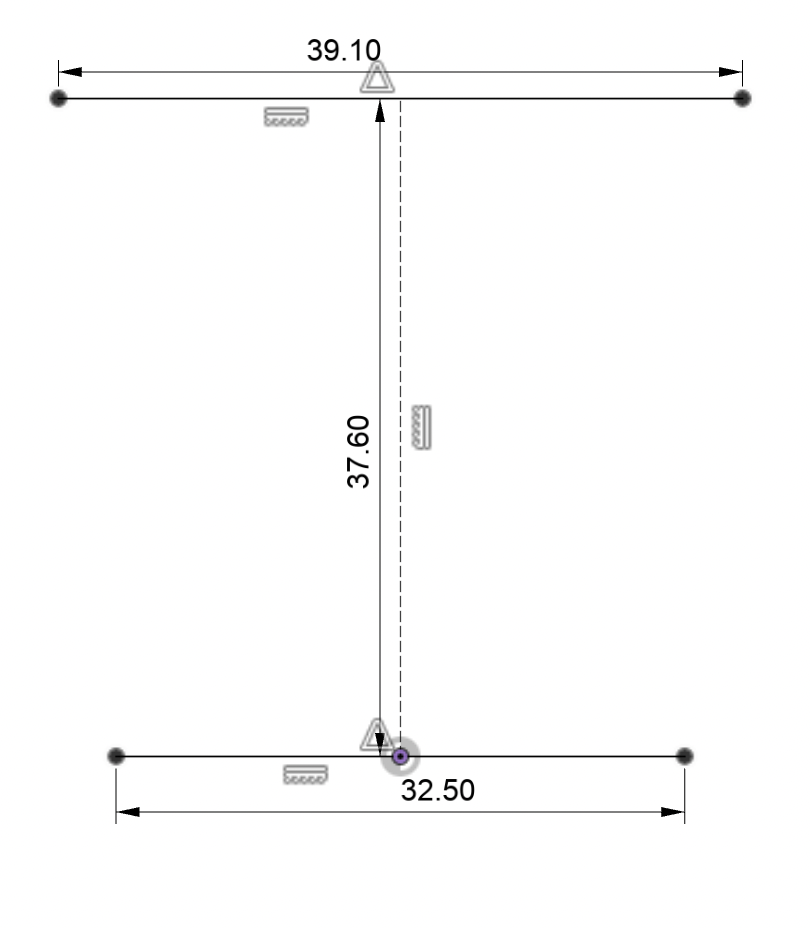
Top-down sketch
I then did the same thing from a side-view.
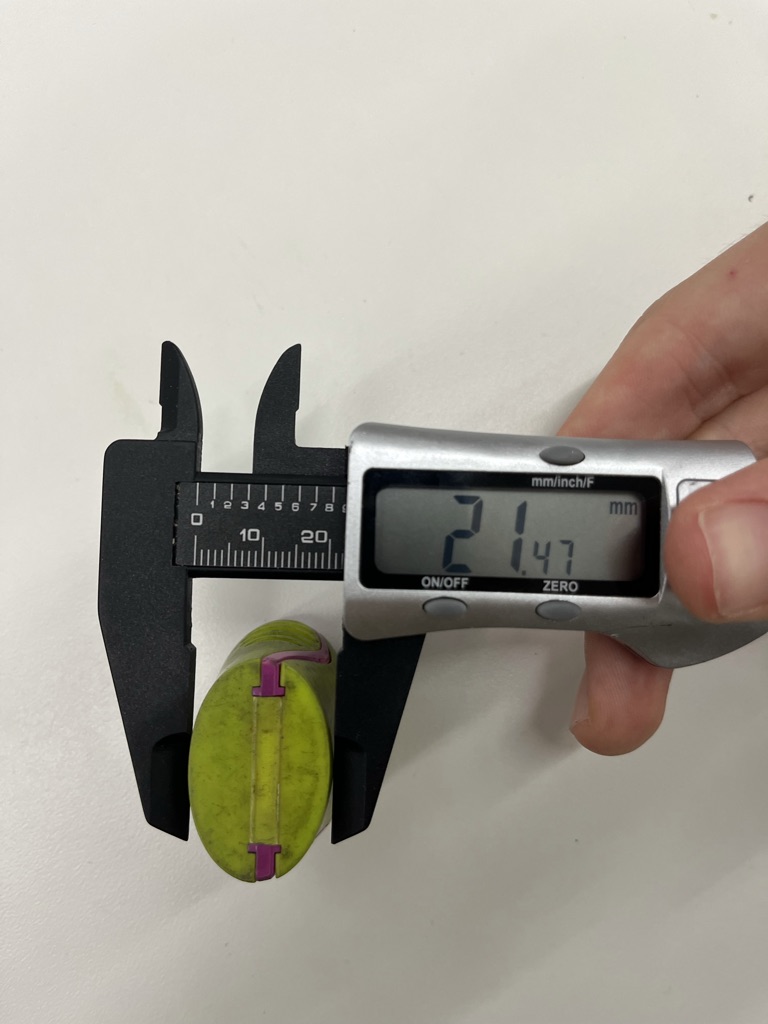
21.47 mm ≈ 21.5 mm
25.69 mm ≈ 25.7 mm
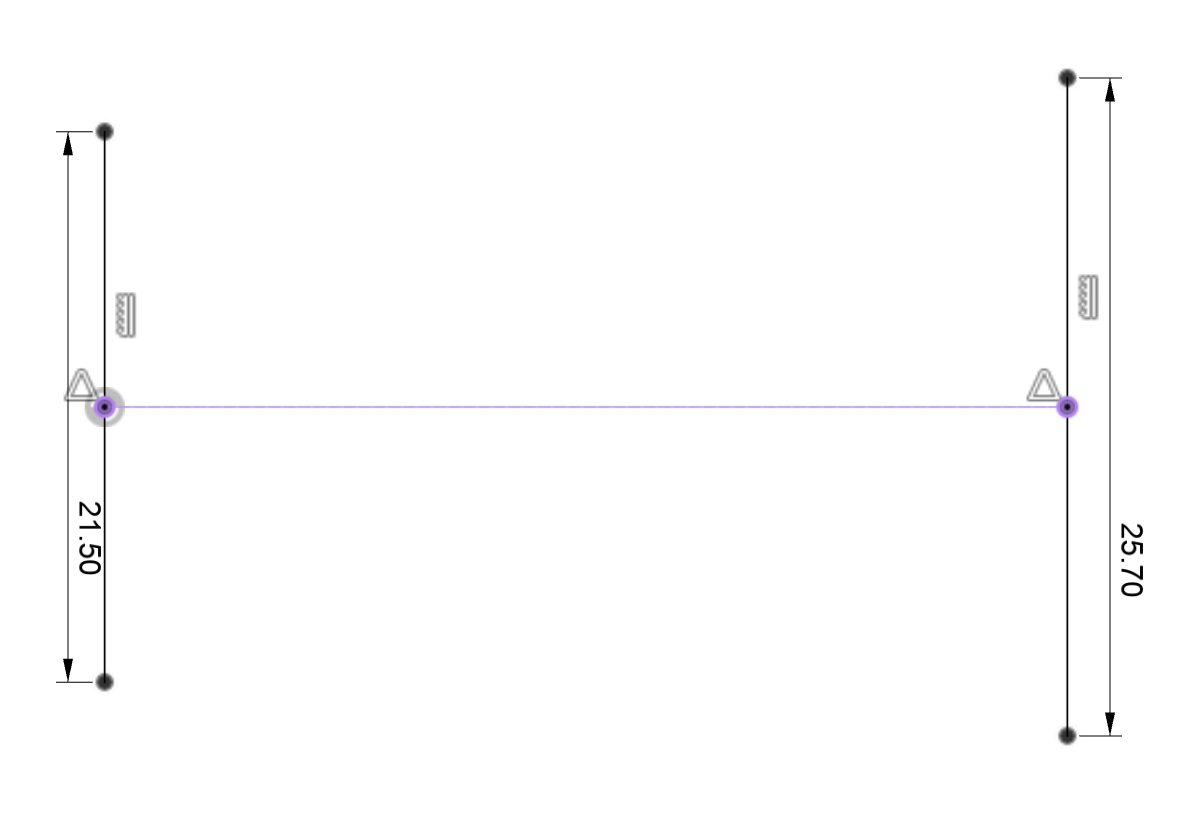
Side sketch
Now that we have this basic sketch, we can begin to create more detailed lines in the two different sketches and then extrude them to create a 3D model.
We can then join the two ellipses we just created using the loft tool, which "creates a transitional shape shape between two or more sketch profiles or planar faces".

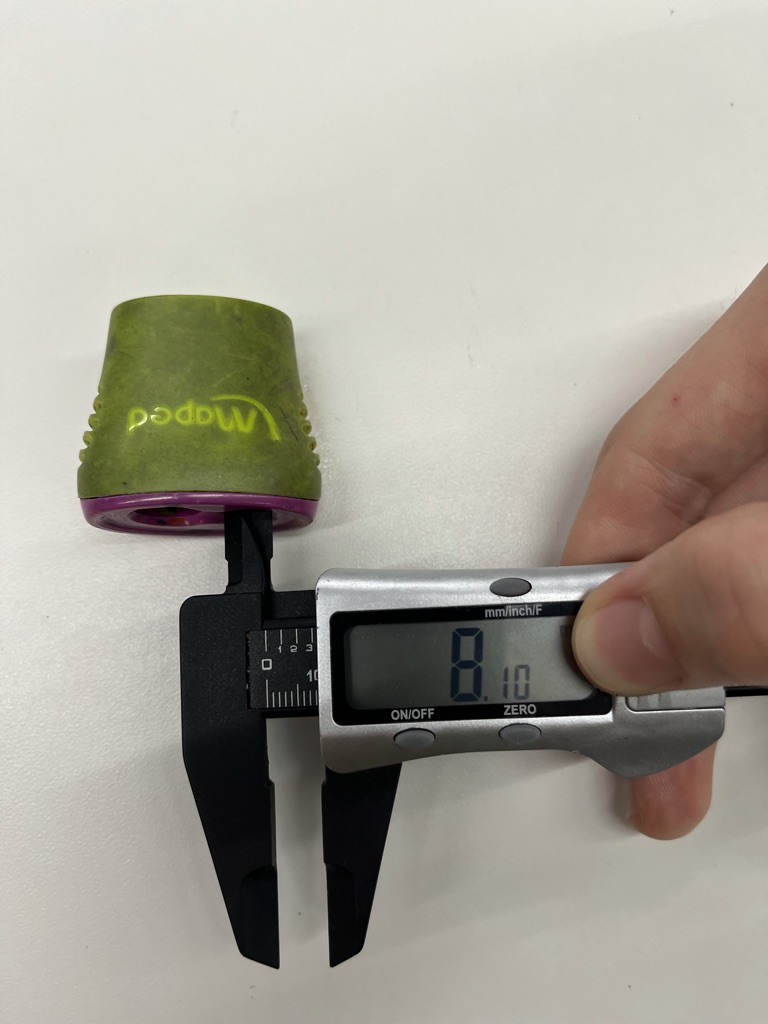
I then went back to the back-side sketch and added two circles with the dimensions I got using the caliper
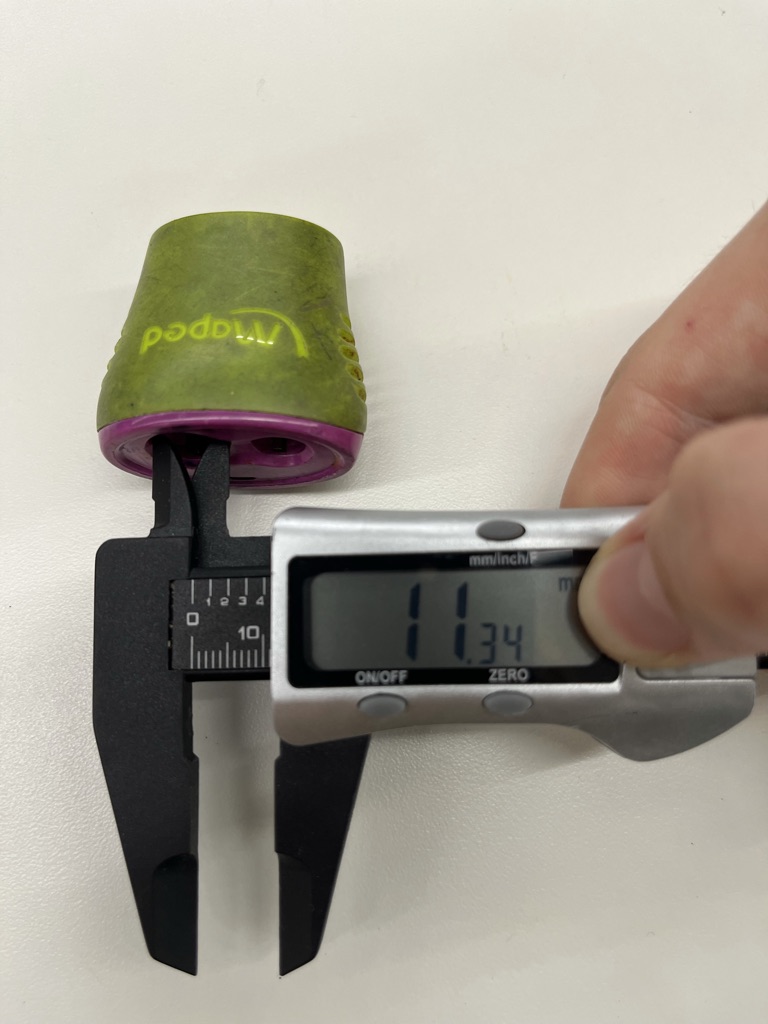
11.34 mm ≈ 11.3 mm
8.1 mm
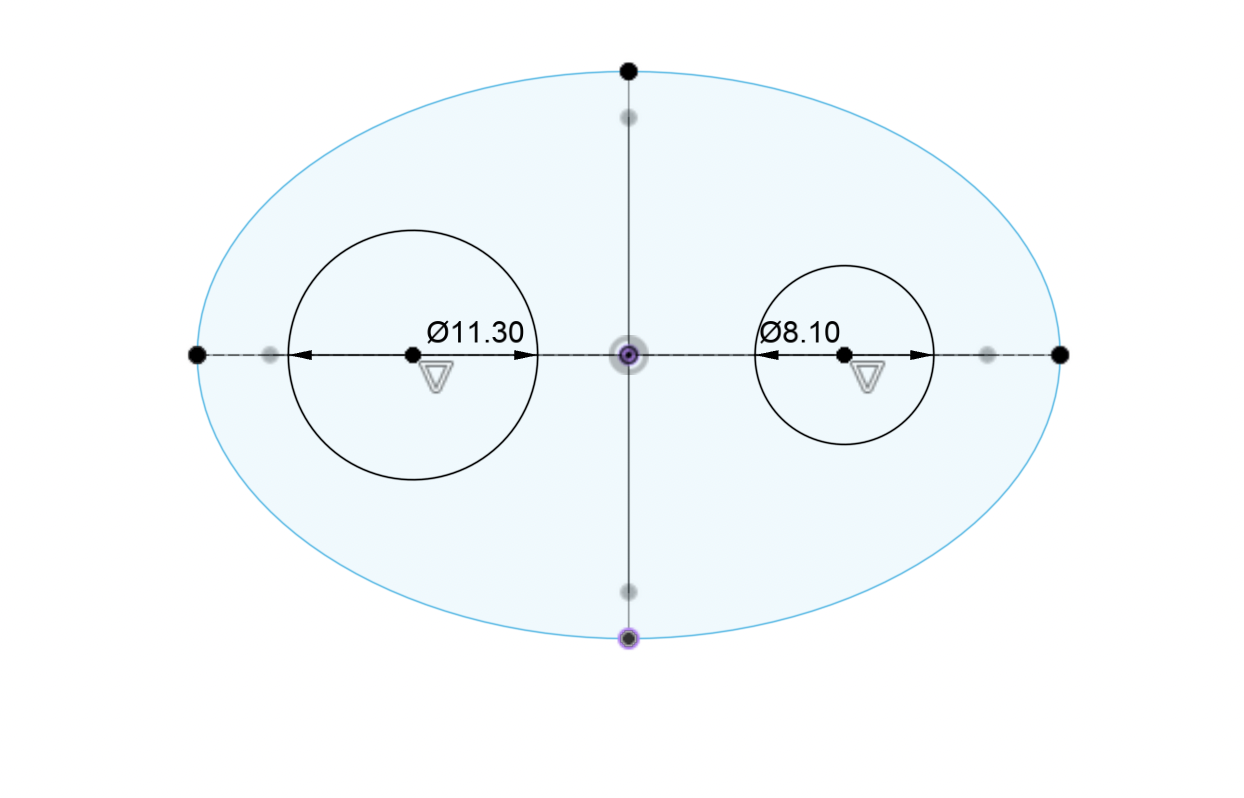
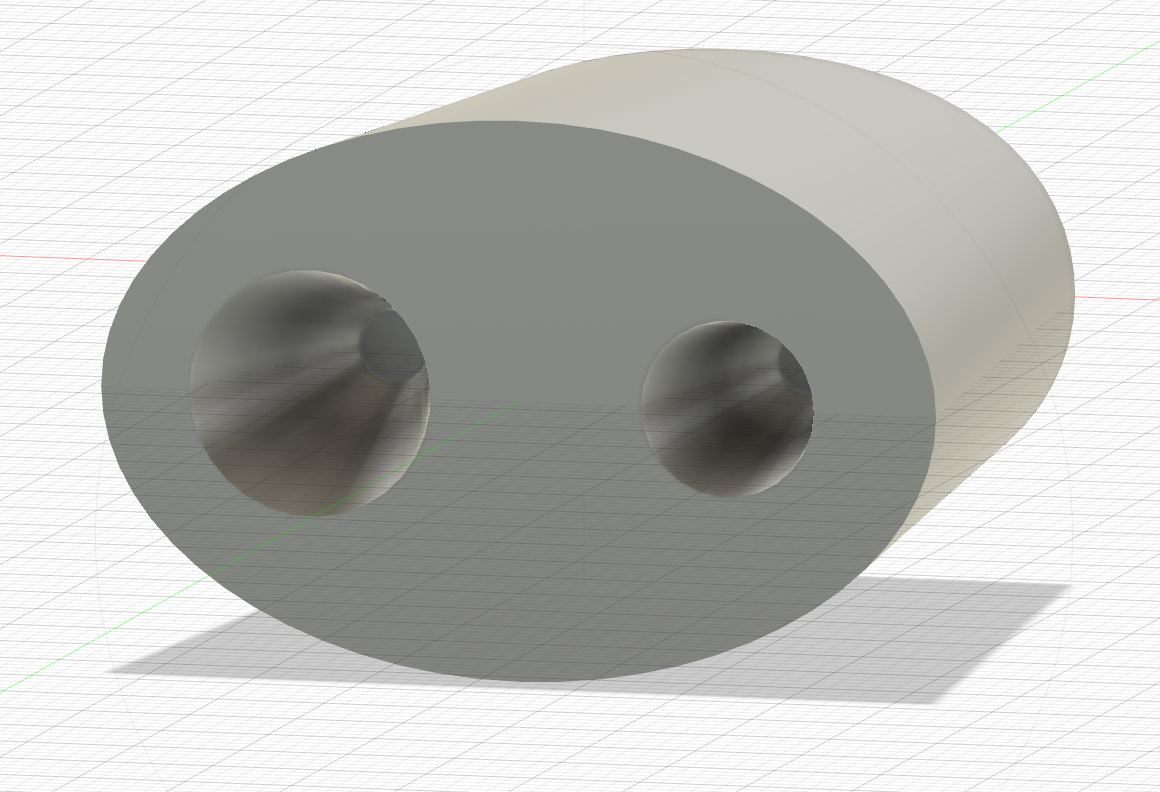
To create the hole, I started by creating an offset plane from those two circles with a distance of 15 mm. I created a sketch on that plane, projected the two circles we just created, and then created two new circles with an offset of -4 mm for the big circle and -2.5 mm for the smaller one. We can now use the same tool we used before, loft, to reproduce the same effect we used earlier, but this time to cut into our existing model.
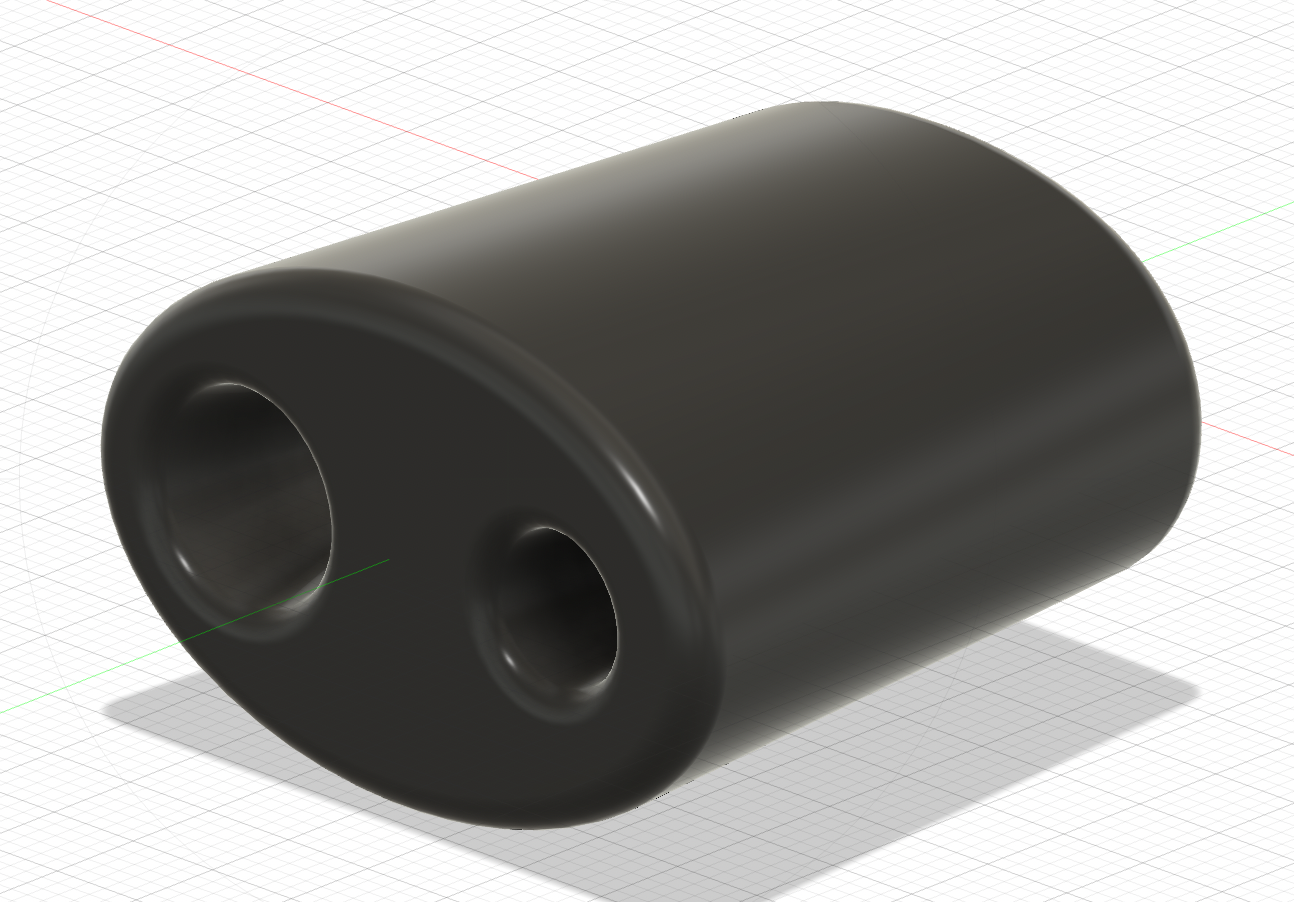
To make it look better, I used the fillet tool to round the edges and added a black material to the model. We could add even more detail to the ouside of the pencil sharpener (some lines and depth) but I don't think it is worth, given that we would re-use the tools used in this model and the previous one. You'll find an image of the finished version bellow, along with some links to download the file in case you want to use/modify the model.
If you want to take a look at the design, you can download the .stl file or the Fusion360 .f3d file, or you can interact with it below!